 Configure authentik SSO
Available on: Enterprise Edition
Setup authentik SSO to manage authentication for users.
In conjunction with SSO, check out the authentik SCIM provisioning guide.
authentik SSO Setup
Install authentik
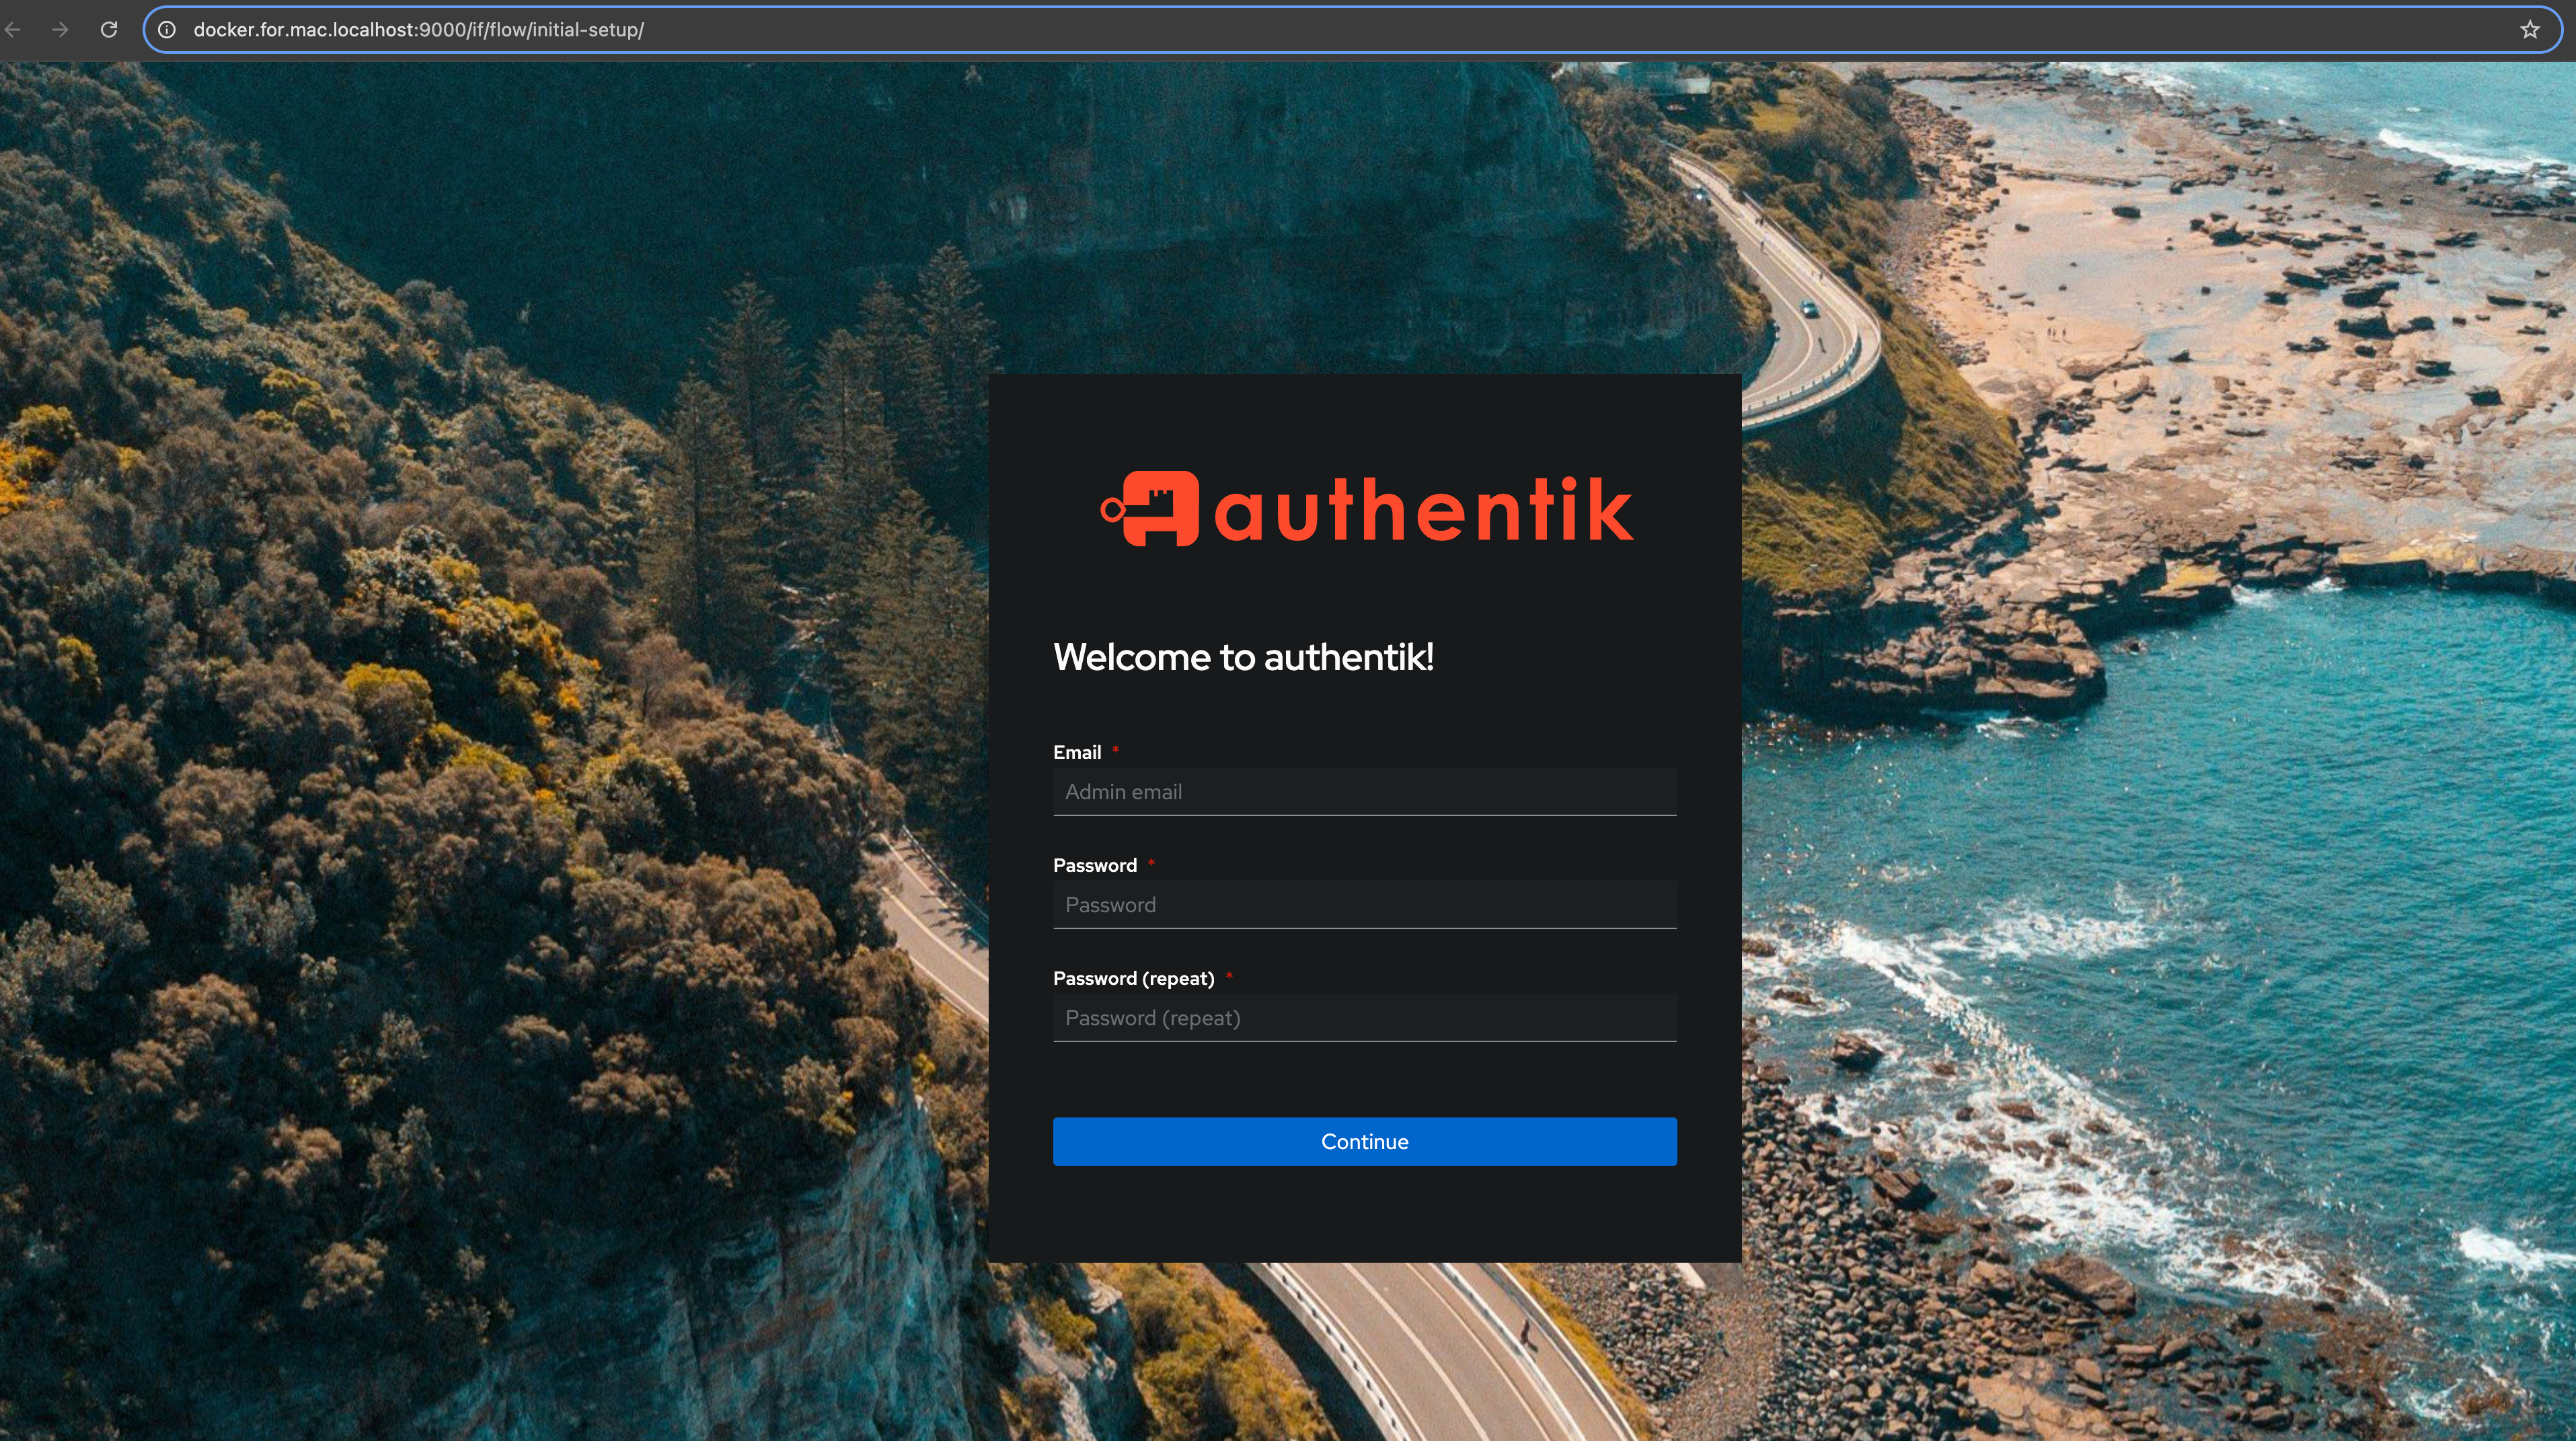
Authentik provides a simple docker-compose installer for testing purposes. Follow the instructions and click on the initial setup URL to create your first user.
Create Application and SSO Provider in authentik
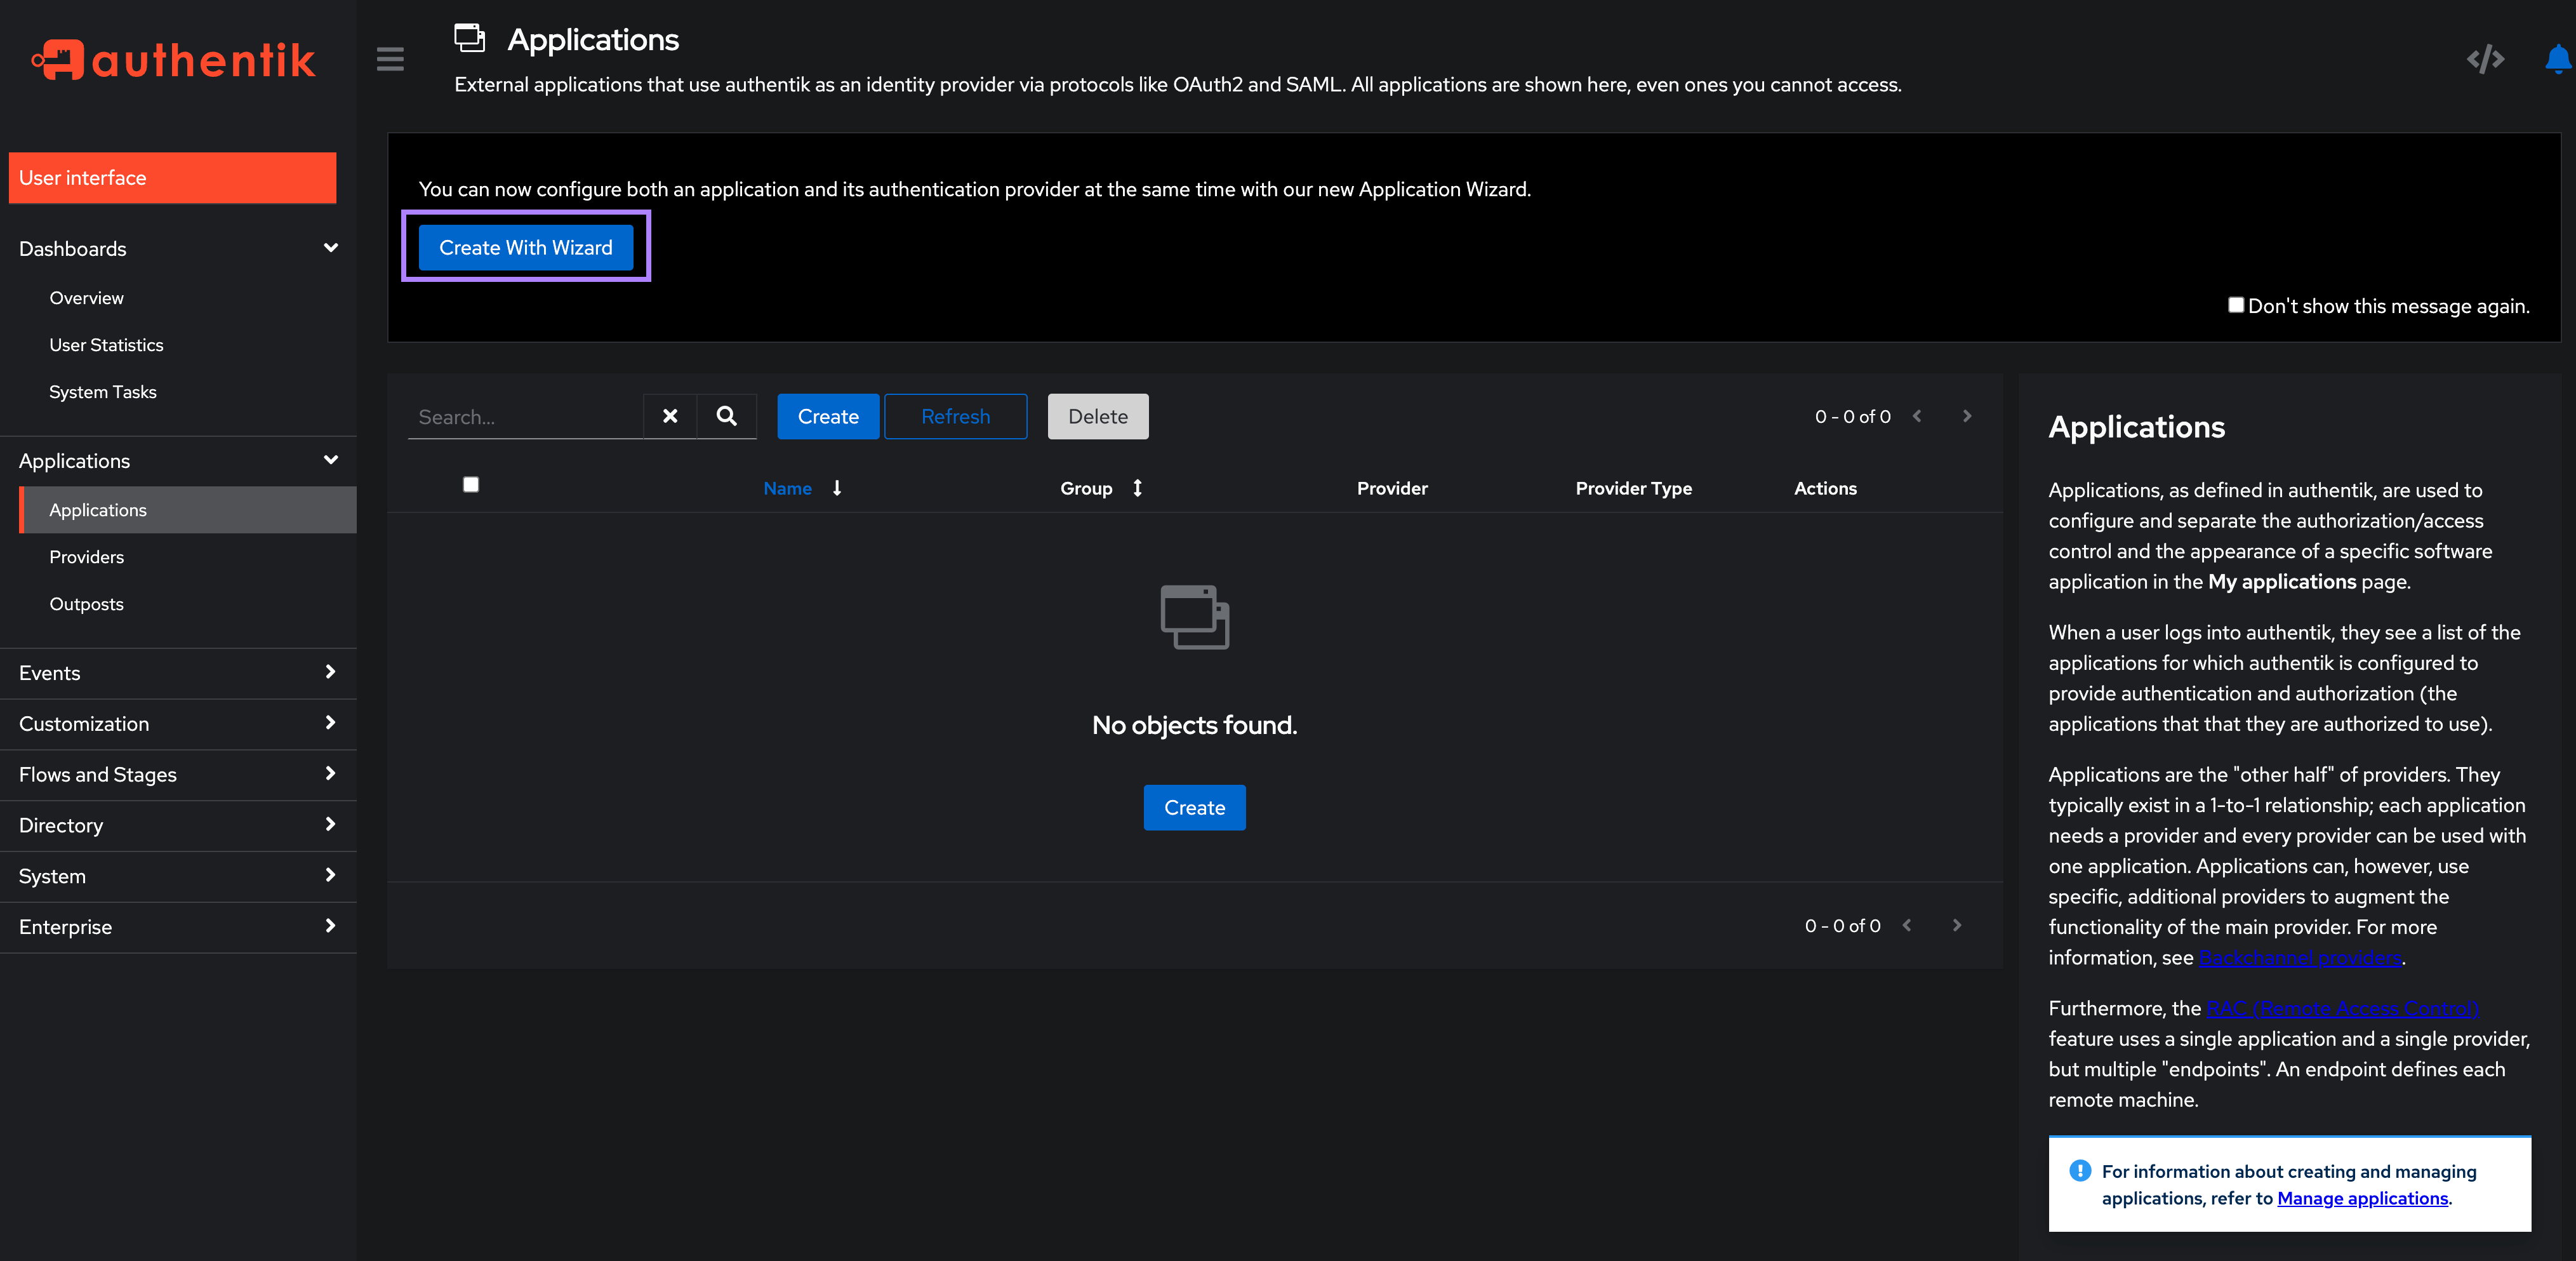
On the left-hand side select Applications → Applications. For simplicity we’ll use the Create with Wizard button as this will create both an application and a provider.
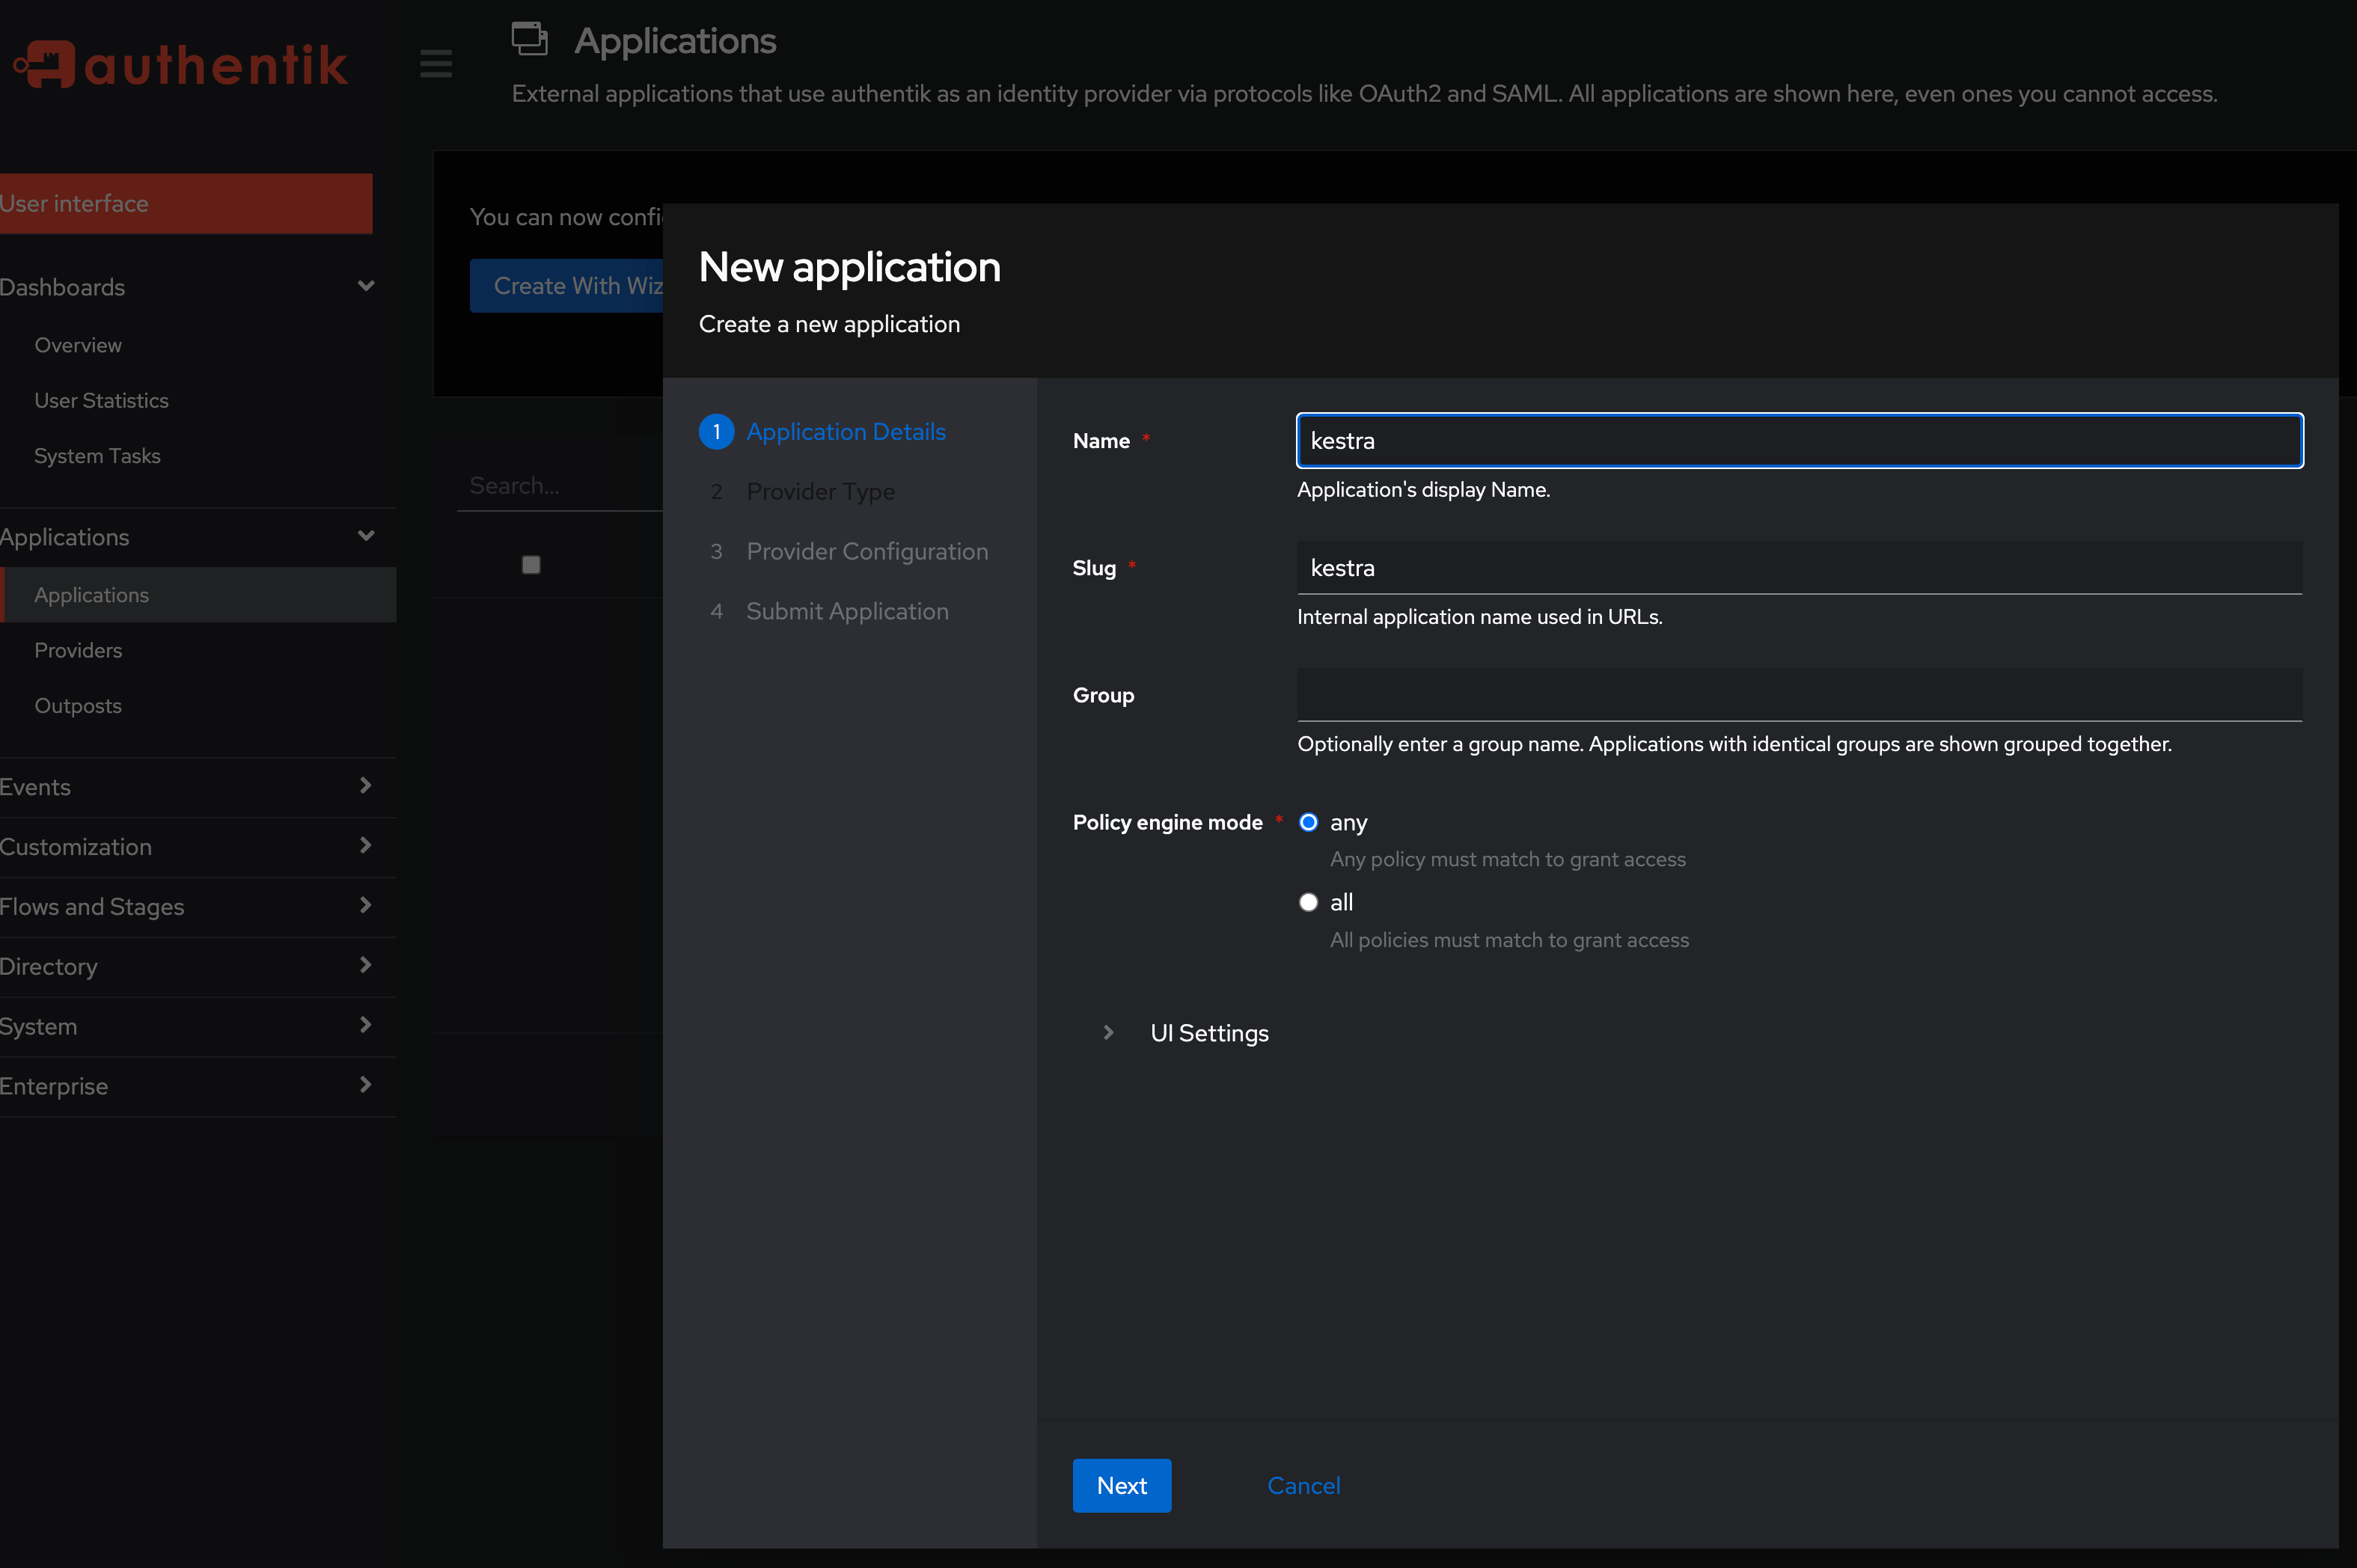
On the Application Details screen, fill in the application name and slug. Set both here to kestra and click Next.
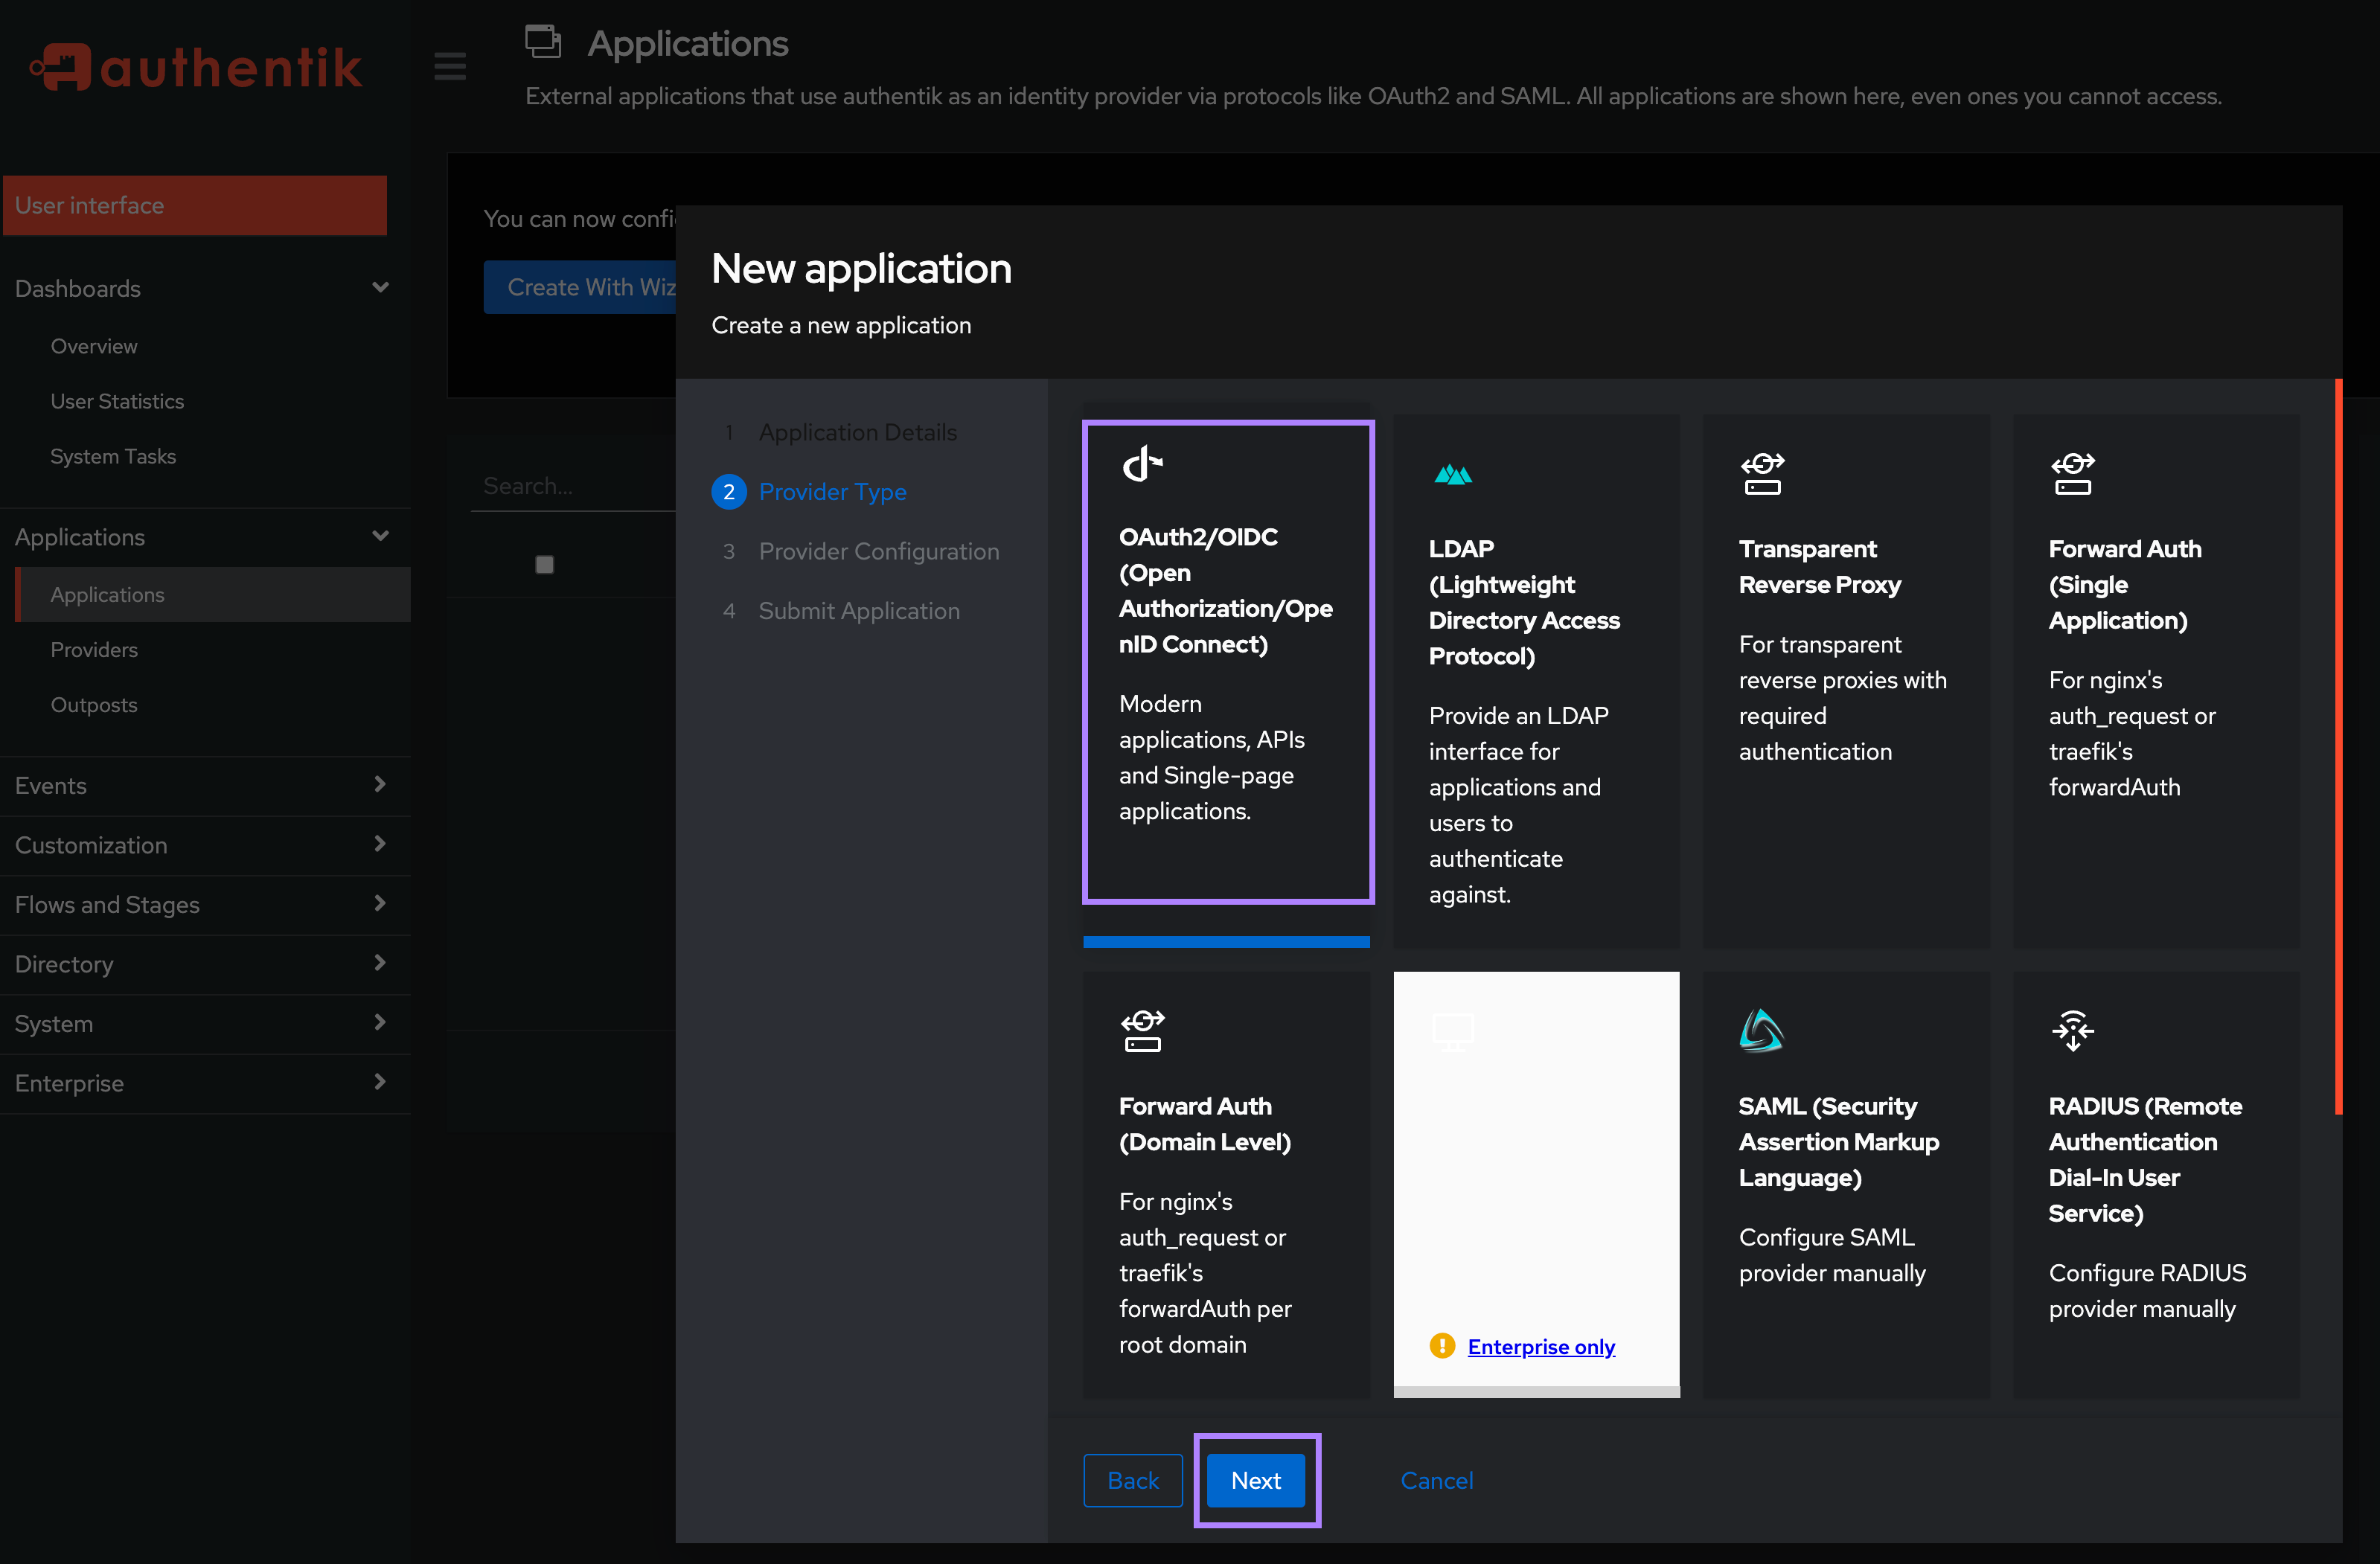
On the Provider Type screen, select OAuth2/OIDC and click Next.
On the Provider Configuration screen:
- In the
Authentication flowfield, select “default-authentication-flow (Welcome to authentik!)” - In the
Authorization flowfield, select “default-provider-authorization-explicit-consent (Authorize Application)”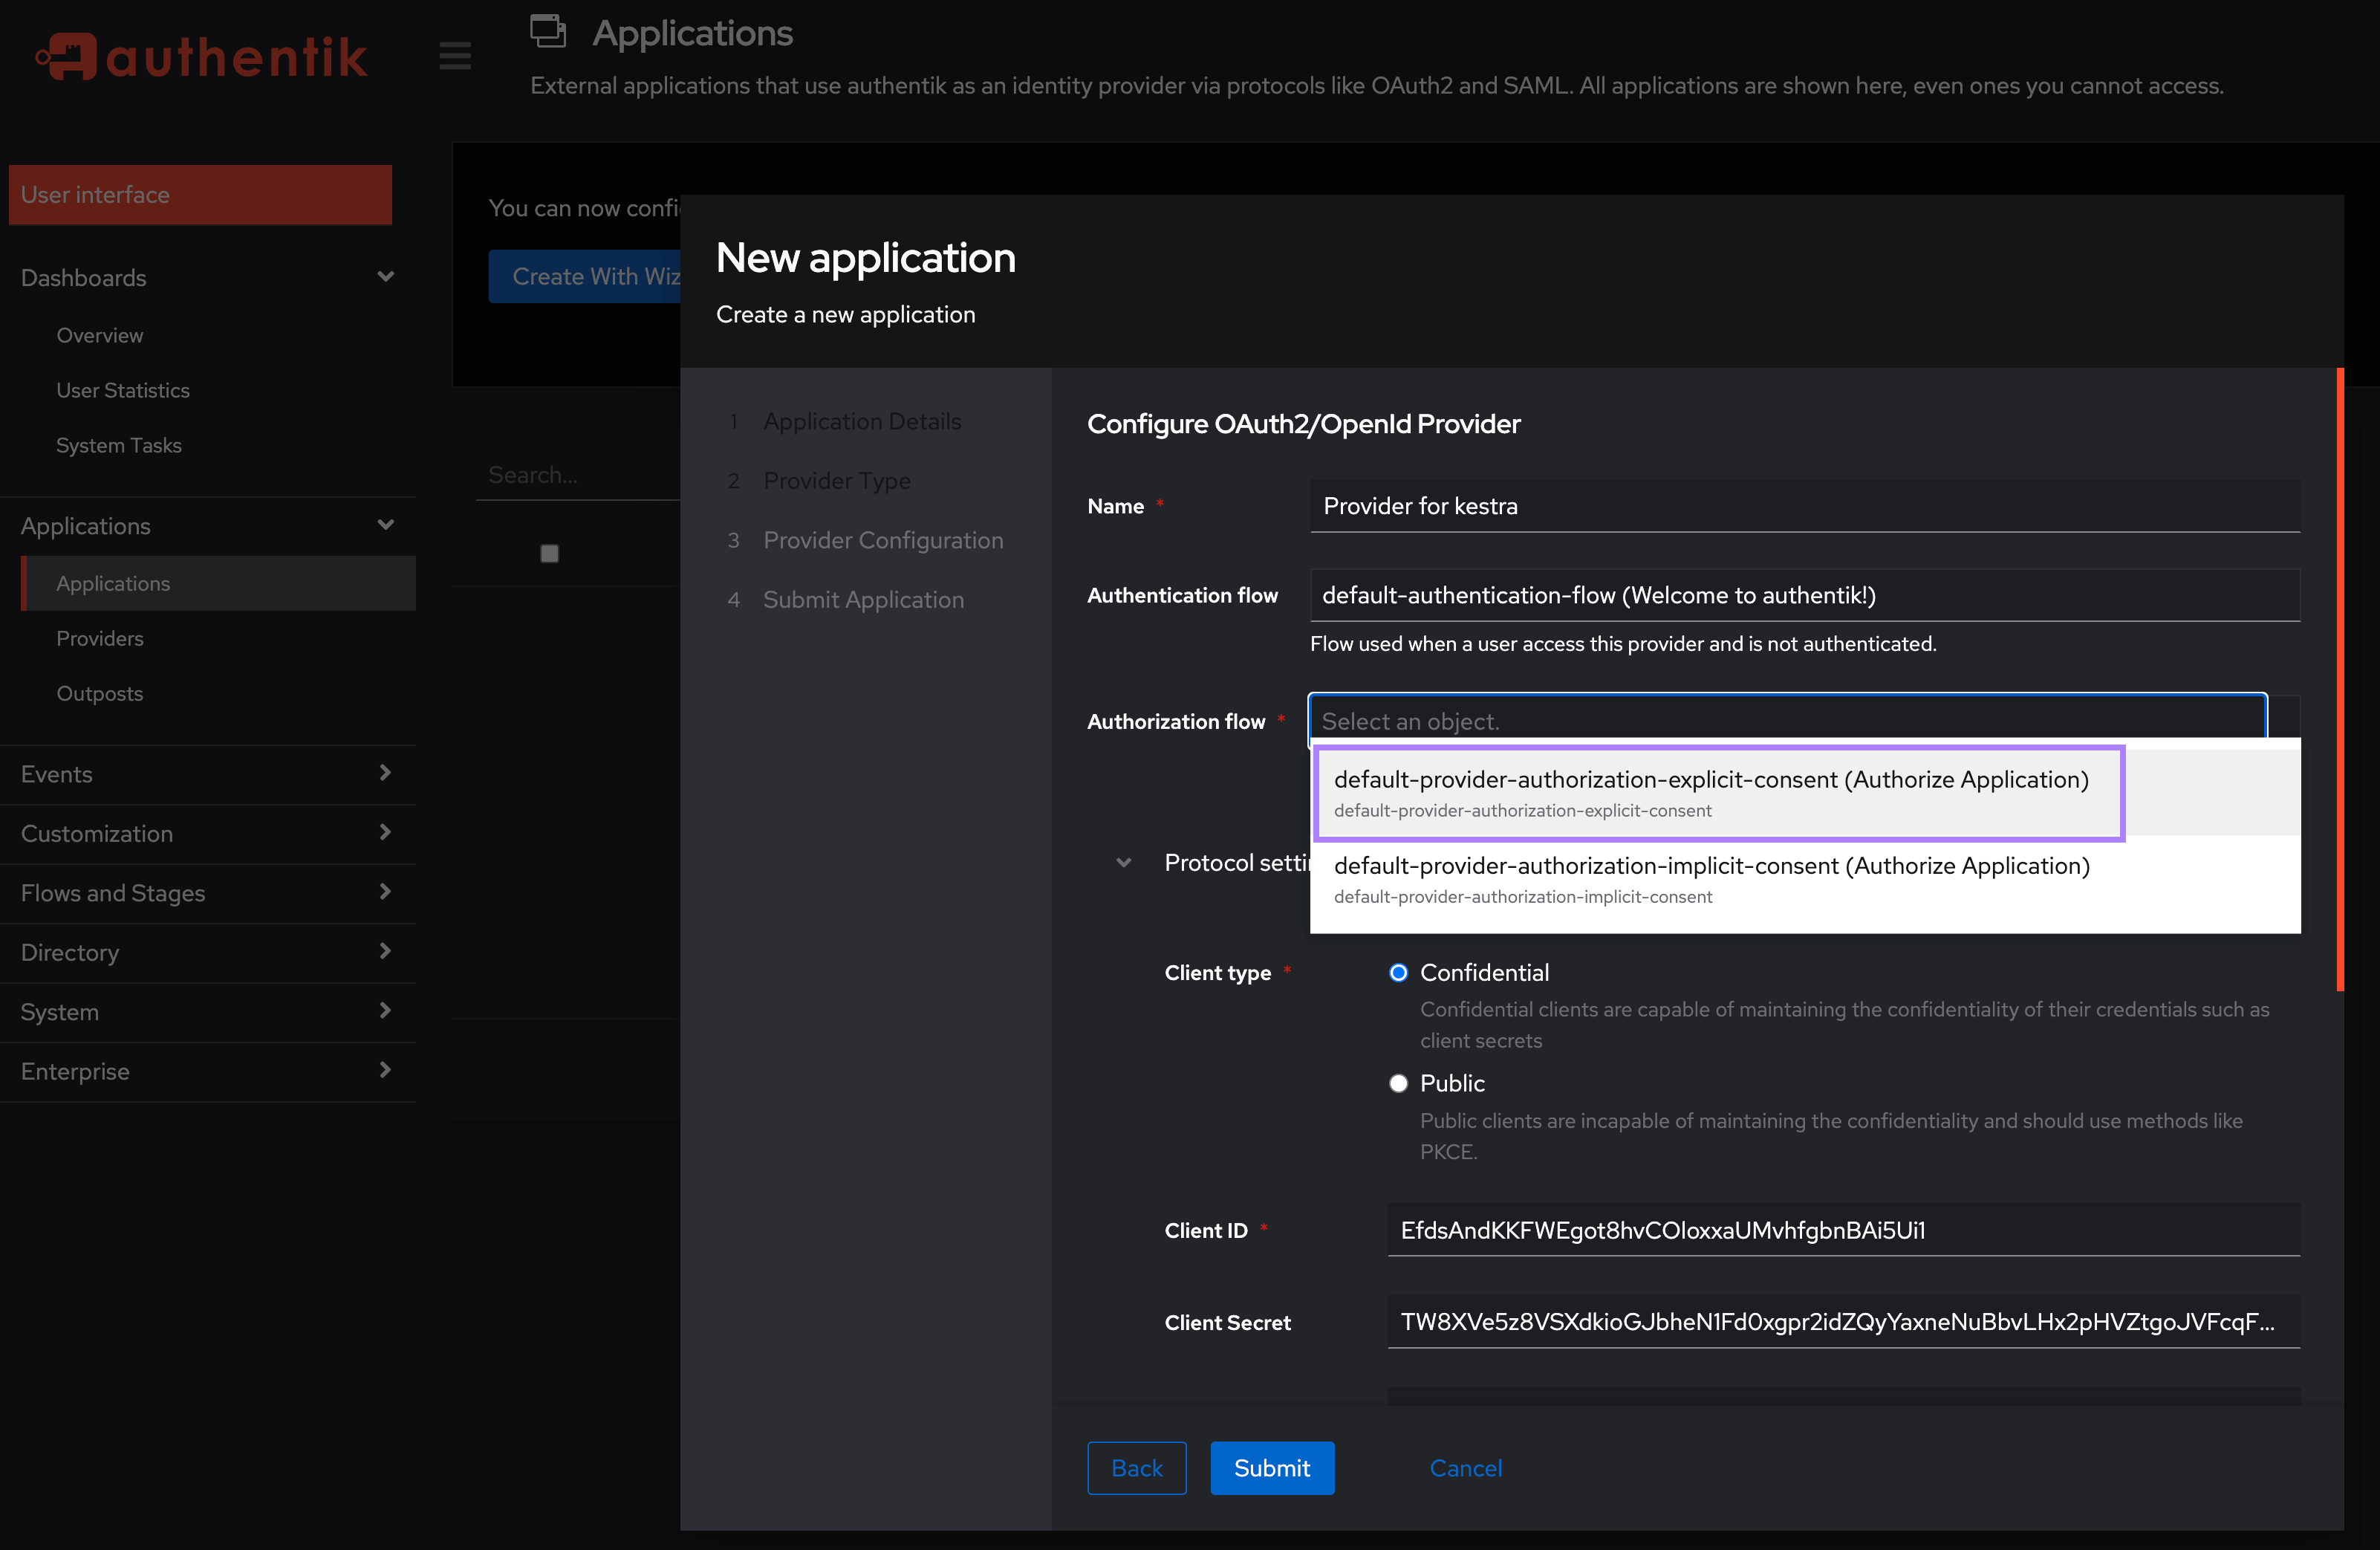
- Keep the Client type as
Confidentialand under theRedirect URIs/Origins (RegEx), enter your Kestra host's/oauth/callback/authentikendpoint in the formathttp://<kestra_host>:<kestra_port>/oauth/callback/authentike.g. http://localhost:8080/oauth/callback/authentik and thenSubmitthe Application: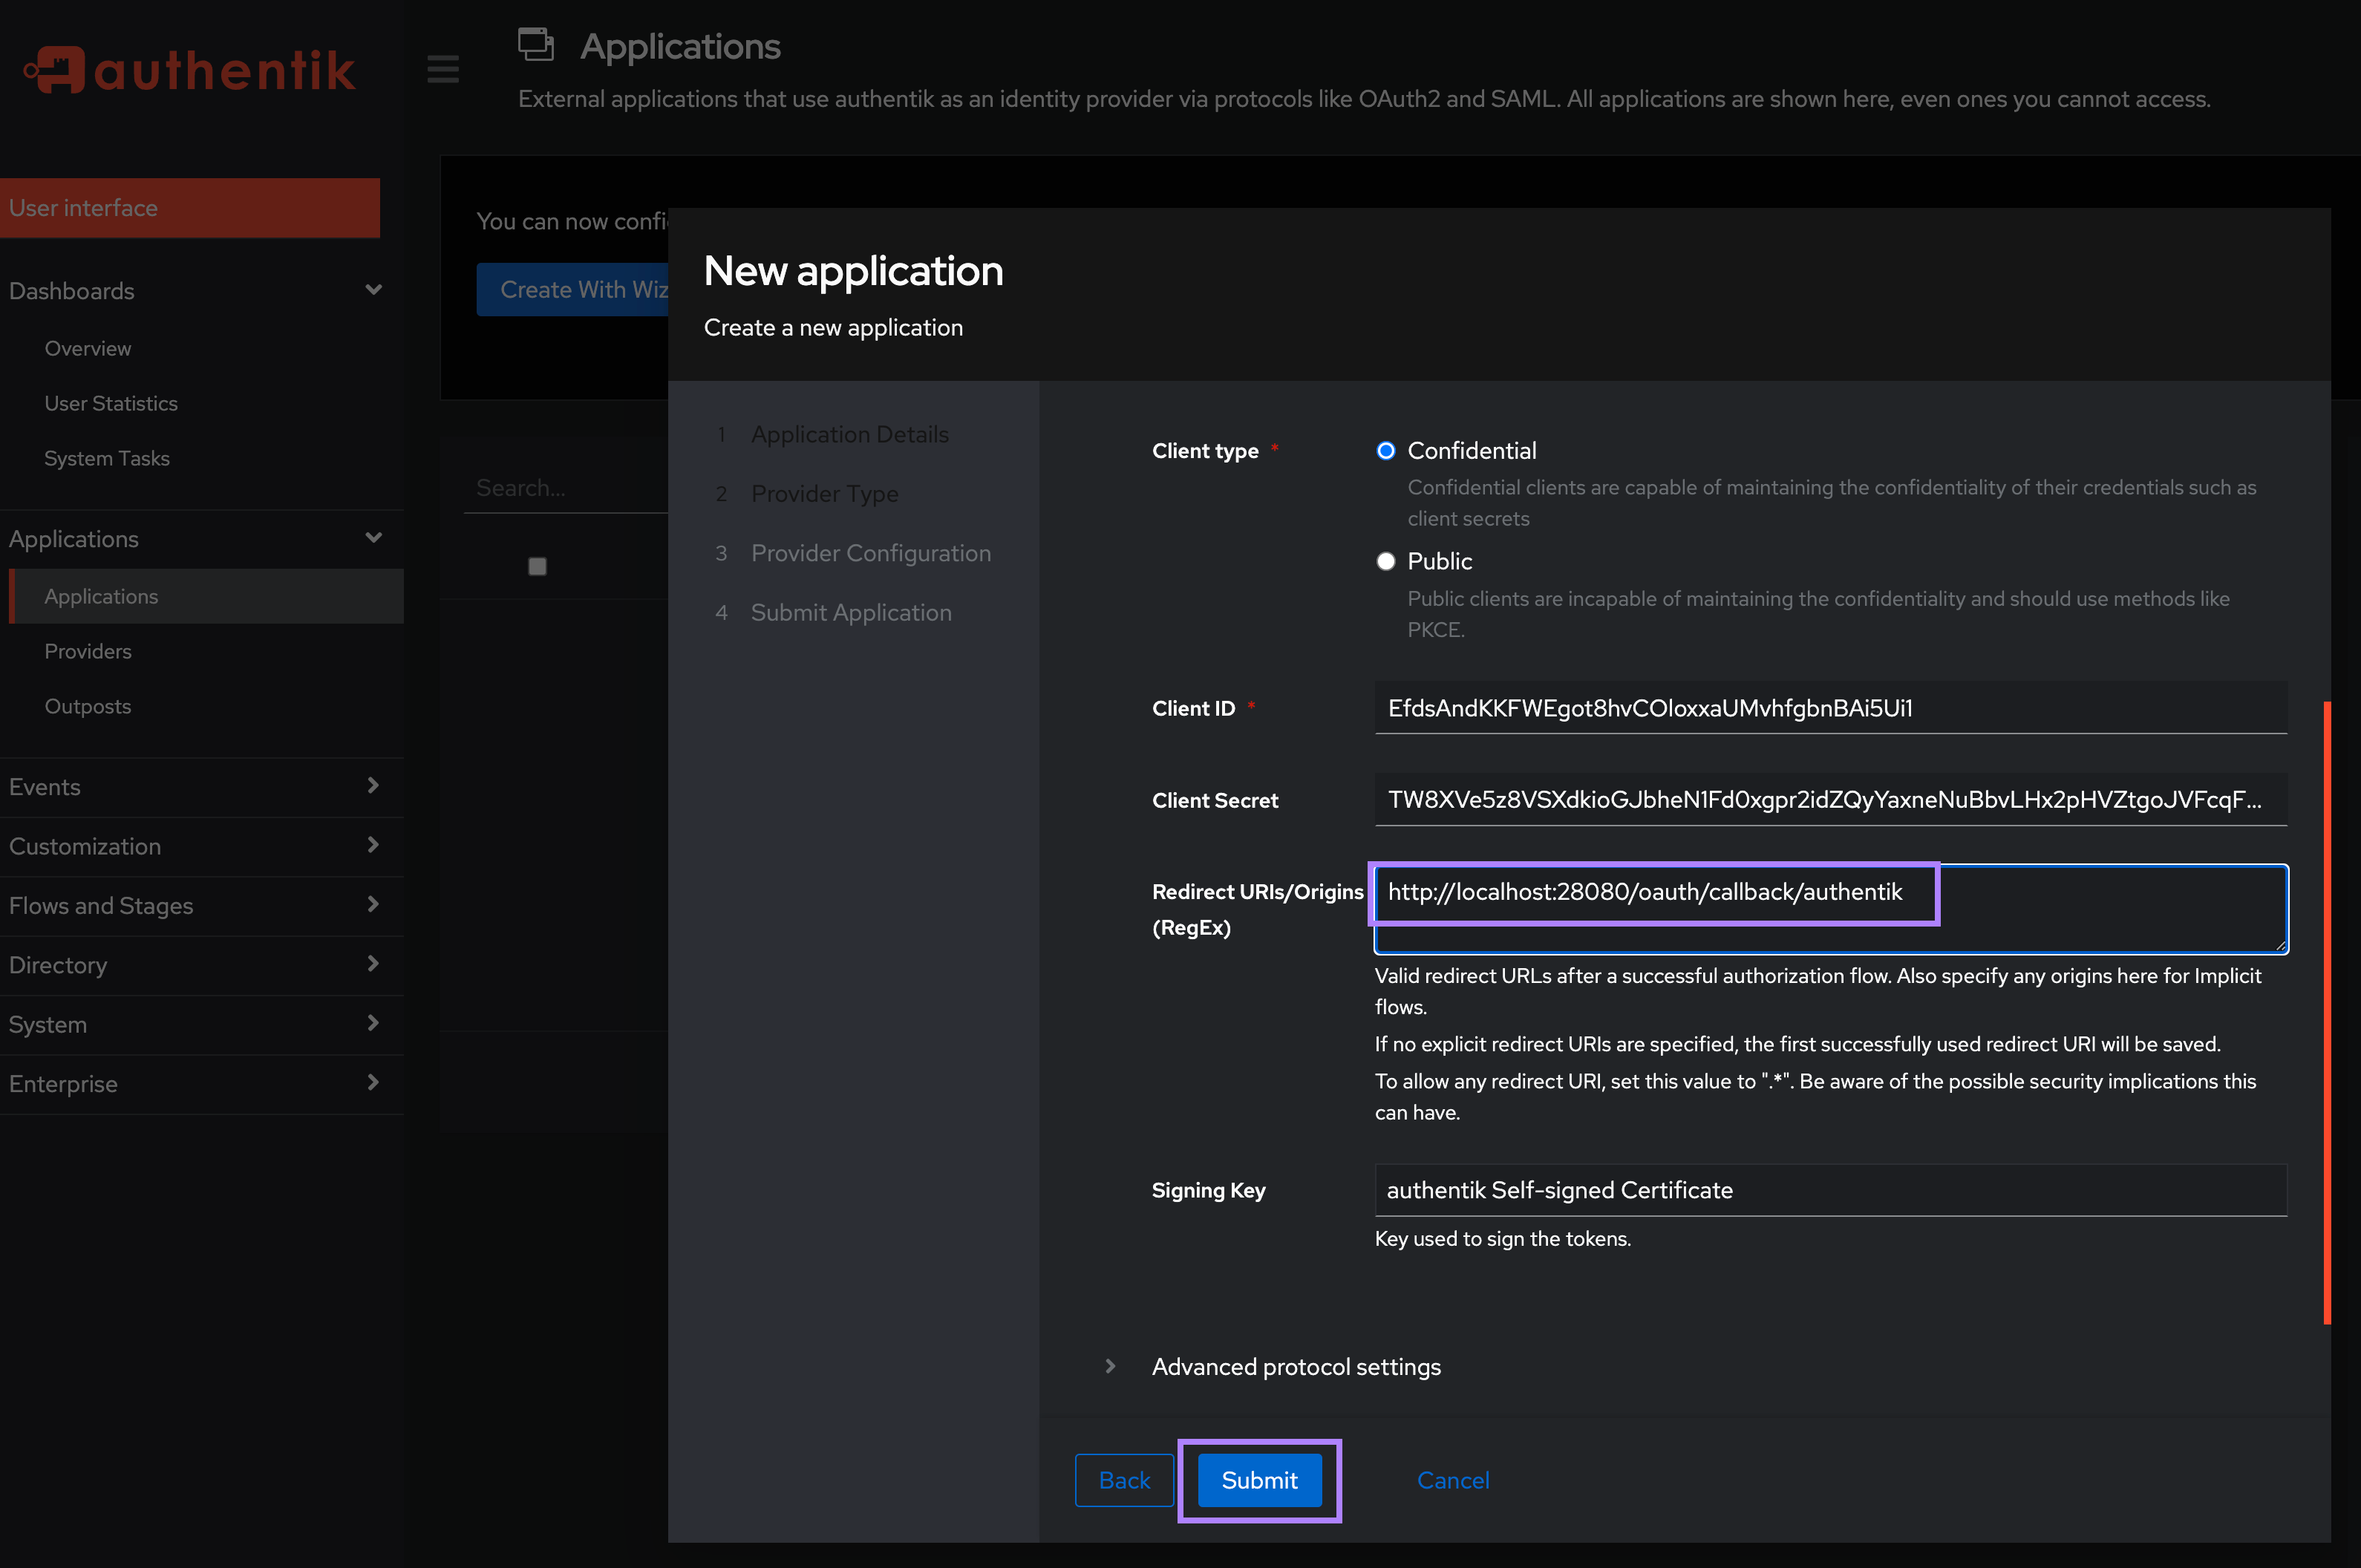
Note the Client ID and Client Secret as you will need these to configure Kestra in the next step.
Configure Authentik SSO in Kestra Settings
With the above Client ID and Secret, add the following in the micronaut configuration section:
        micronaut:
          security:
            oauth2:
              enabled: true
              clients:
                authentik:
                  clientId: "CLIENT_ID"
                  clientSecret: "CLIENT_SECRET"
                  openid:
                    issuer: "http://localhost:9000/application/o/kestra/"
You may need to adjust the above issuer URL if you named your application something other than kestra. Make sure to update that URL to match your application name http://localhost:9000/application/o/<application_name>/.
Configure a Default Role for your SSO users in Kestra Settings
To ensure that your SSO users have some initial permissions within Kestra UI, it's useful to set up a default role for them. You can do this by adding the following configuration under the kestra.security section:
kestra:
  security:
    defaultRole:
      name: default_admin_role
      description: "Default Admin Role"
      permissions:
        NAMESPACE: ["CREATE", "READ", "UPDATE", "DELETE"]
        ROLE: ["CREATE", "READ", "UPDATE", "DELETE"]
        GROUP: ["CREATE", "READ", "UPDATE", "DELETE"]
        EXECUTION: ["CREATE", "READ", "UPDATE", "DELETE"]
        AUDITLOG: ["CREATE", "READ", "UPDATE", "DELETE"]
        USER: ["CREATE", "READ", "UPDATE", "DELETE"]
        BINDING: ["CREATE", "READ", "UPDATE", "DELETE"]
        FLOW: ["CREATE", "READ", "UPDATE", "DELETE"]
        SECRET: ["CREATE", "READ", "UPDATE", "DELETE"]
        BLUEPRINT: ["CREATE", "READ", "UPDATE", "DELETE"]
        INFRASTRUCTURE: ["CREATE", "READ", "UPDATE", "DELETE"]
        KVSTORE: ["CREATE", "READ", "UPDATE", "DELETE"]
  ee:
    tenants:
      enabled: true
      defaultTenant: false
⚠️ Make sure that your defaultRole is added under the kestra.security section, not under micronaut.security. Also, ensure that the default-role has the necessary permissions for your users to interact with Kestra. The above configuration is just an example and you might want to restrict the permissions boundaries for production use.
Was this page helpful?